An Introduction to Felt Making and Felt Making Kit
What is felt?
Felt is produced through the application of water, soap, friction and sometimes heat to wool fibres. Repeating these actions results in the fibres contracting by the cuticles of the wool latching on to each other and entangling more as additional friction is applied resulting in a stable fabric.
Felt Making Kit
- Merino wool
- Silk fibres (optional)
- Soap flakes/Felting Solution (Mix 1 dessert spoon of soap flakes in a litre of warm water) or olive oil soap.
- Bubble wrap
- Towels
- Rolling Pin
- Plastic bottle (milk bottle works fine) with holes punched in the top
Making A Piece of Flat Felt
Method
The fibres will shrink approximately 1/3rd during the felting process so you need add 30% to 50% to the required final size
- Lay down your towel, cover with the bubble wrap, bubble side up. The bubble wrap should be approx 5cm larger all round than the piece of felt you are making.
To start make the piece slightly smaller width wise than your rolling pin. If you want a larger piece then you can always use a broom handle though obviously this will be much more difficult to handle if you are a complete beginner so probably best to start with something small! - Hold a length of merino in your left hand and gently pull out the fibres with the right (reverse if you are left handed.) If you pull too hard you will pull out too much fibre and end up with lumpy felt!!
- Lay a vertical row of fibres across the top edge of the bubble wrap
- Lay out a second row, overlapping the first by half. Continue down until you have covered the required area
- Now lay a horizontal layer over the top ensuring that you evenly cover the whole surface
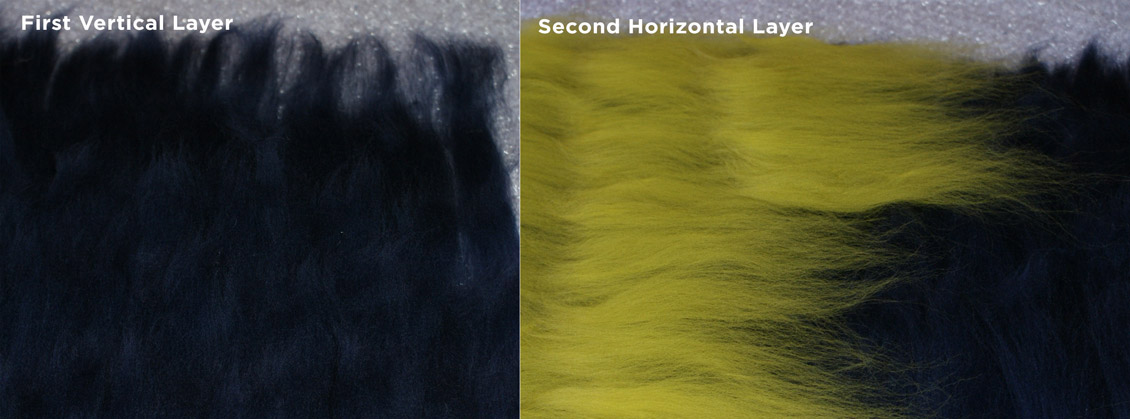
We have used two colours to give a better idea of how to lay out your fibres. Obviously you can use just a single colour - Add any surface decoration – silks, roving /knitting wool, synthetic fibres either randomly or in a pattern
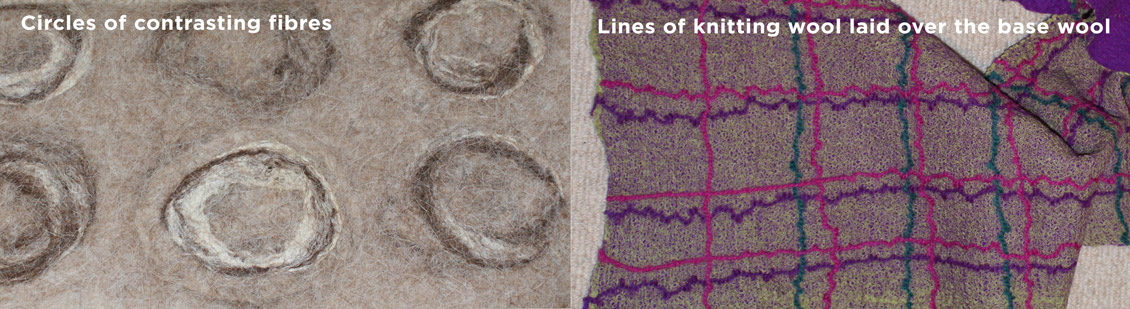
Don’t forget that the fibres with shrink by 30%-50% so don’t place decoration too close together - To make the felting solution dissolve 1 tablespoon of the soap flakes in a litre or warm water. Don’t have the solution too hot as this will start the felting process too quickly and you will lose control over the process
- Using your plastic bottle with the holes in the top, sprinkle with the felting solution ensuring the surface is evenly covered.
- Carefully cover the whole with a second piece of bubble wrap – bubble side down
- Using the rolling pin gently roll the solution into the fibres to distribute the felting solution evenly over the fibres and remove any air pockets.
- Carefully remove the top bubble wrap and check that all the fibres are wet. If not add more felting solution, replace the bubble wrap and repeat the above process.
- Firmly roll the bubble wrap and fibres round the rolling pin and secure at both ends with string or wrap in the towel
- Roll on a firm surface 100 times, distributing the weight evenly across the pin. (1 roll = backwards and forwards movement)
- Unroll and turn the bubble wrap package 90˚, re-roll and complete the process three more times i.e. you will have completed 360˚and rolled 400 times.
The fibres will shrink in the direction of rolling so it is important that you change the direction evenly.
If you find the piece is shrinking more one way than another then increase the rolling to compensate Of course you may wish a piece to shrink one side more than the other so concentrate on rolling on that side. You have the control over how much you want the fabric to reduce. - By this stage the fibres should be firmly held together. You can now introduce more heat by either dunking the piece into a bowl of hot soapy water, agitating and then throwing the piece onto your table top, re-rolling 25 times each turn. Repeat this process until you are satisfied all the fibres are firmly held in place and the piece is the size you require or put the damp piece into a plastic bag and microwave for 30 seconds on high, remove from the bag, throw and complete the rolling process as above
- Unwrap and test the fibres to ensure they are felted. The fibres should not lift from the surface when pulled between the finger and thumb.
- Rinse in cold water to remove the soap. White vinegar can be added to the final rinse to neutralise the soap.
- Rub in a towel to remove excess water, pull into shape and leave to dry on a flat surface. Steam iron on the reverse side to bring out the lustre in any silk fibres